DSLR scan video is here! by Jamie Maldonado

UPDATE (1-11-19): COLOR NEGATIVE EDITING video is finally up. http://www.youtube.com/watch?v=4Ffznu3gHXc

UPDATE (7-9-18): Check out my vlog, which will feature a long-awaited update and addition to this video!. www.youtube.com/c/jamiemaldonado

It's unscripted on my behalf, and I really should attach this to an exhaustive post, but this is so long overdue I just want to get it out there for everyone who has been so patient. I hope it answers any questions! I'll be adding lots of notes to the video as I go, so keep checking and feel free to make suggestions and ask questions. 

BIG thanks to Ariel Rawlings for helping get the video finished and out there at last. 

Happy viewing, I hope!

P.S. Please note that I added a note to use a self timer if you forget your release cable like I did. Also, the longer your self timer is set for, the less vibration will show up. Mirror vibration at 1/15 or 1/20 of  second shouldn't be too terrible as far as I can tell. Of course, the best solution is to not forget your release cable ... 

Site updated; DSLR scan video to come! by Jamie Maldonado

UPDATE: Check here for my new scanning video! https://www.youtube.com/watch?v=68f43NSZCh4

I updated my portfolios (the main gallery, weddings and iPhone) and gave my site a minor polish, including captions and titles for many images, especially in the primary gallery. My main gallery includes several images from my Personal Space project, in addition to a number of other editorial portraits. Thank you for browsing!

Also, I had intended to be finished with it today, but I will soon be posting a much-requested video on DSLR scanning. I mostly just need to do the voiceover and I need to make sure I have everything presented thoroughly and non-threateningly. I filmed a demonstration scan the other day, and was amazed at how quickly it all went. I hope you'll find it all as easy as I do!

Anyway, thank you again for your views, and I hope to reward your patience with the video! I have a lot of editing to do for various jobs, so I keep having to juggle things. But rest assured, it won't be long!

*UPDATE: June 6, 2014: I swear I am working on this video, but hit a serious and odd technical hurdle. I believe I know how to resolve it, so it will be up  as soon as I can catch up!

Digital editing of black and white film negatives by Jamie Maldonado

July 24, 2018, update: The account I used to upload this video has been hijacked and I no longer have control over it. YouTube graciously helped me take it down, and you can see it at my vlog: http://www.youtube.com/c/jamiemaldonado ... I will now present the video in its original location ... slightly below this.

UPDATE: Check here for my new scanning video! https://www.youtube.com/watch?v=68f43NSZCh4

In my previous post, I discussed how to use a macro lens, light table and a copy stand to "scan" film with a DSLR. I made a quick video to explain some basics about how to edit the image when you get it to your computer. This video is a first take, so please excuse my "uhs," random errors (I correct most or all as I go) and any accidental omissions. Feel free to ask any questions you might have, or to ask me to fill in any gaps I possibly left. I posted my final edit below the video. Enjoy!

Here is my original tutorial for editing B&W DSLR film photography scans. Yes, you can scan your film negatives with a DSLR or even a mirrorless camera. My scanning tutorial can be seen here: http://youtu.be/68f43NSZCh4 I errantly posted this tutorial on an old account, which was recently stolen and could not be recovered.

Jade on black and white film that was "scanned" by a DSLR and edited digitally. 

Jade on black and white film that was "scanned" by a DSLR and edited digitally. 

Yes, your DSLR really is the best film scanner by Jamie Maldonado

Ashley. This macro image of a film negative on a light table using a Nikon D600 renders a smooth range of tones, actual grain!

Ashley. This macro image of a film negative on a light table using a Nikon D600 renders a smooth range of tones, actual grain!

UPDATE, 1-11-19: I’ve added a color negative scan editing video here: http://www.youtube.com/watch?v=4Ffznu3gHXc

UPDATE: Check here for my new scanning video! https://www.youtube.com/watch?v=68f43NSZCh4

It's not an old idea to use a camera to reproduce images from film. It is logical then to not be shocked that photographers have turned their digital cameras toward film, hoping to gain some magical portal to the analog past. With megapixel counts rising, reports of success have grown. A handful of bloggers have shown how their DSLRs are creating increasingly faithful renditions of their film images … something most scanners have not done such a wonderful job with. 

After reading a particularly convincing post on this topic (this, too), I decided to try my own hand at taking backlit, macro images of my film. And I am happy to report that this experiment has forever changed my photography. The best part is that it's not terribly difficult, and it's especially easy to repeat.

First, a little back story: I have always loved the look of a black and white image taken through a Hasselblad V Series camera. The magical squares are burned into my mind as the height of art in photography. I finally managed to get my hands on a nice setup, but have been repeatedly disappointed with my efforts to capture this magic when I put my film to a scanner. My photos always looked mushy and rarely captured that stunning detail I long coveted. Finally, I realized it was the scanner at fault. Flatbeds can only do so much. So I explored wet prints, sending off to photo labs for scans, and everything else I could dig up. I even got my hands on a Nikon Coolscan, which indeed did make nice black and white scans … all it took was waiting what seemed like forever, playing a guessing game with second-party software and clinging to increasingly outdated computers so I could still use it. And sadly, my schedule just doesn't allow time to be a proper traditional printer.

After some successful experiments, I went head-first and ordered a 4x5 Logan Slim Edge Light Pad from B&H Photo. I don't own a macro lens, but I do have a couple of Hasselblad macro rings, so I decided to order an adapter to put my 80mm 2.8 CF on my Nikon D600. Getting the height and angles correct was a major pain, but I got my first good result.

And wow. Just wow. 

Meredith. My first true "scan" using this technique. In contrast, I thought this was a crap image when I scanned with a rather decent flatbed.

Meredith. My first true "scan" using this technique. In contrast, I thought this was a crap image when I scanned with a rather decent flatbed.

Convinced, I ordered a proper copy stand from ebay. And even cut masks for the film (to hold it in place and reduce flare). It's something I can now set up in about 10 minutes, use for 30 minutes and be ready to edit photos. The photos capture a great range of tones, and even have convincingly sharp grain.

I'm still in awe of it: RAW photos of those magical little Hasselblad squares … What's even better is that I really don't feel the need to try the panoramic stitch method. I've done it, and I can see modest improvement, but for little visible benefit. My squares of D600 sensor probably measure out to 12-16 megapixels, and that's just fine for me. It's entirely worth it to be able to take a few snaps of the frame and move on. And I get full RAW control over that image, without what I feel like is a bit of mostly unneeded hassle. 

Imagine if I took advantage of the mega megapixels of a D800, or a Sony A7r. 

I can get REAL GRAIN. It's possibly not as microscopically razor sharp as the panoramic method, but I really don't care. I get that magical detail I long for. That "medium format" look. That "Hasselblad" look. And I could probably make a convincing 15x15 print with ease. A step up to a mega megapixel camera, and that balloons to 20x20. 

Jade and drab lighting, though you'd never know. Love the versatility this technique gives me, too. I could have made a few interpretations of this, just like traditional printing!

Jade and drab lighting, though you'd never know. Love the versatility this technique gives me, too. I could have made a few interpretations of this, just like traditional printing!

Alas, this is not a perfect method. I am still dealing with film curl. Do I use glass? Does it hurt the quality? Do I just need a heavier mask? It also takes work to make sure everything is as straight as possible. Also, my macro rings do not hold my lens perfectly still. I have to focus and then let things settle, so I am sure they did not move out of focus. Also, an autofocus macro lens would be AMAZING. I would love if I could get live view through a computer and control everything with the benefit of using my large monitor to check focus. These are mostly things I'm working on, or am just coping with right now. On top of that, balancing color images tends to be quite tricky. But slides are magical.

Despite any issues, I am thoroughly convinced that this method is THE future. It blows away flatbeds and even the mighty Coolscan. It looks just as good as drum scan to me. But this requires no insanely expensive gear, no funky liquids, and not really much time. In the amount of time I wait for a scanner to run a couple of frames, I'd have set up, "scanned" 10 frames, and broken down. And these images look worlds better. 

And yes, this works for other formats, too. I have convincingly shot 4x5 film and 35 mm film. I've purchased a relatively inexpensive macro bellows to accomplish this. What's neat about 4x5 is that you can fill most of the D600 frame with an image, meaning you wind up with probably a good 20 megapixels of image. The same goes for 35mm.

Come back December 26 to see my workflow, from negative to posting a JPG online or making a print. And feel free to ask me any questions you have!

Ashley again. Hasselblad goodness meets RAW digital processing. Wonderful.

Ashley again. Hasselblad goodness meets RAW digital processing. Wonderful.

A little post-processing walkthrough by Jamie Maldonado

Jade, the finished image.

Jade, the finished image.

I was asked on Facebook if I could explain how I edited this photo. In classic style, I overdid my explanation. Here it is! (And of course the blog editor is being an outrageous pain tonight and I mysteriously have no captions at the moment.)

First, here's my shooting/lighting roundup from Flickr (slightly modified): Key light is a Calumet Travelite 750 through a medium softbox, camera right and about 5 feet away. Fill is a Powerlight at 1/32 in a beauty dish at about 8 feet away and just camera left (and this light was triggered by the Pocket Wizard, which set off the optical triggers built into all of the other lights). A small Genesis 250 was probably at 1/2 power and boomed above her for a hair light and the back light was an old tungsten hot light. I shot at a show shutter speed to allow blur. Camera settings were: 1/8 shutter, f/11 at 100 ISO. My Nikon 70-200 VRI was at 180mm. 


Why did I fill with a beauty dish? To get more texture from the hard light. That's paramount to the look of this shot. Also, I used a hot light for the warmth and to provide the painterly motion in the background and the edge of her shoulder. The reason her face isn't blurry is because it was lit entirely by the flash, which fires at a speed more than fast enough to capture the image without motion blur. However, the background light was controlled largely by the shutter speed … it's science stuff. I'm not great at explaining that part. Whilst your f/stop can control your ambient light, your shutter speed only affects your flash output if you go over your sync speed (and then it leaves ugly dark spots). 

Before.

Before.

The reason I'm going through all of this mess is because this picture was accomplished mostly at the camera. Though you will see that it was a bit of a warm mess when it came to my computer. The strange mixture of lighting and the fact that I don't usually do custom white balances in camera show here. I did know I wanted a warm and harmonious color pallet. It also shows I should have had some hairspray on hand for poor Jade. The weather was not playing nice with her, but that's why we have Photoshop, right? (Note, it is HARD to remove frizzy hair from a gradiated background. It is ALWAYS best to handle that on camera. And I'm sorry Jade, I'm keeping the photos smaller so you won't be embarrassed.) 

After getting my White Balance in Lightroom, I set my white and black points (alt+ white slider and alt+blacks slider) and did some spot adjusting on her eyes and maybe a gentle radial adjustment on her face … just to pop it out lighting wise. I did a little sharpening and a mild vignette with the Post-Crop vignetting tool. From there, I tossed out a few Replichrome settings, fading the colors just a bit to soften the contrast between the highs and lows, and adding a bit of an S-curve to it. So basically, the best way I can say it, is that I smoothed the range of tones within the highlights and the shadows. I have a hard time describing this, but it's a lot of reasons why I'll bring the black point of the curve up almost an entire zone. It gets the hip "faded black" thing, but also kind of squashes together the rest of the tones in my eye. It makes it more film-like to me, and less harsh and digital. I also did a little tweak in the Luminance portion of the HSL sliders ... I brightened the orange tones in her skin. (For warmth, of course.)

After some spot removals and the addition of a tiny bit of grain (to enhance the grain-like look of her skin from the hard fill light), I jump over to Photoshop, where I have almost nothing left but retouching.  

Jade. After, in Photoshop CS6.

Jade. After, in Photoshop CS6.

In Photoshop, I cloned out all the frizzy hair and and big "blemish" that was left. Then I did a retouching technique called Frequency Separation … which could have its own blog post. I highly recommend looking it up, and mastering all the steps, even if it takes a while. I don't use it on every photo, but it certainly is amazing for shots like this. 

You'll notice that Hue/Saturation layer between my retouching channels … and it is there only to whiten her eyes. It's between the channels because I figured it didn't need to affect any other layer above it. Probably a useless placement. 

Finally, my other favorite Photoshop trick: Selective color. I worked my way through every color channel, conservatively correcting the color until it fully reached harmony. It basically all got a little bit more golden, and I added that same quality just slightly to the blacks. The main contribution to this image, however, was that it took a tiny bit of red out of her face, and made it more golden/yellow. 

I added one last curve (pictured) to re-soften the blacks and add a tiny bit of contrast. 

I'm not sure if there's anything of educational value in here, but I hope it helps!


A quick introduction to the RAGE Bus Project by Jamie Maldonado

The R.A.G.E. Bus crew: Caitlin, Jamie and Natalie. See the full set here: http://www.flickr.com/photos/theantrider/sets/72157635443705724/

The R.A.G.E. Bus crew: Caitlin, Jamie and Natalie. See the full set here: http://www.flickr.com/photos/theantrider/sets/72157635443705724/

Note: This is the first set of photos in what I hope to make a long-term project about the R.A.G.E. Bus and the people behind it. Though I centered this introductory story around my longtime friend, each member of the crew brings a unique perspective and personality to the table. I hope to reveal more about them and their well-reasoned intentions as I expand this story and hopefully catch them at other destinations.

---

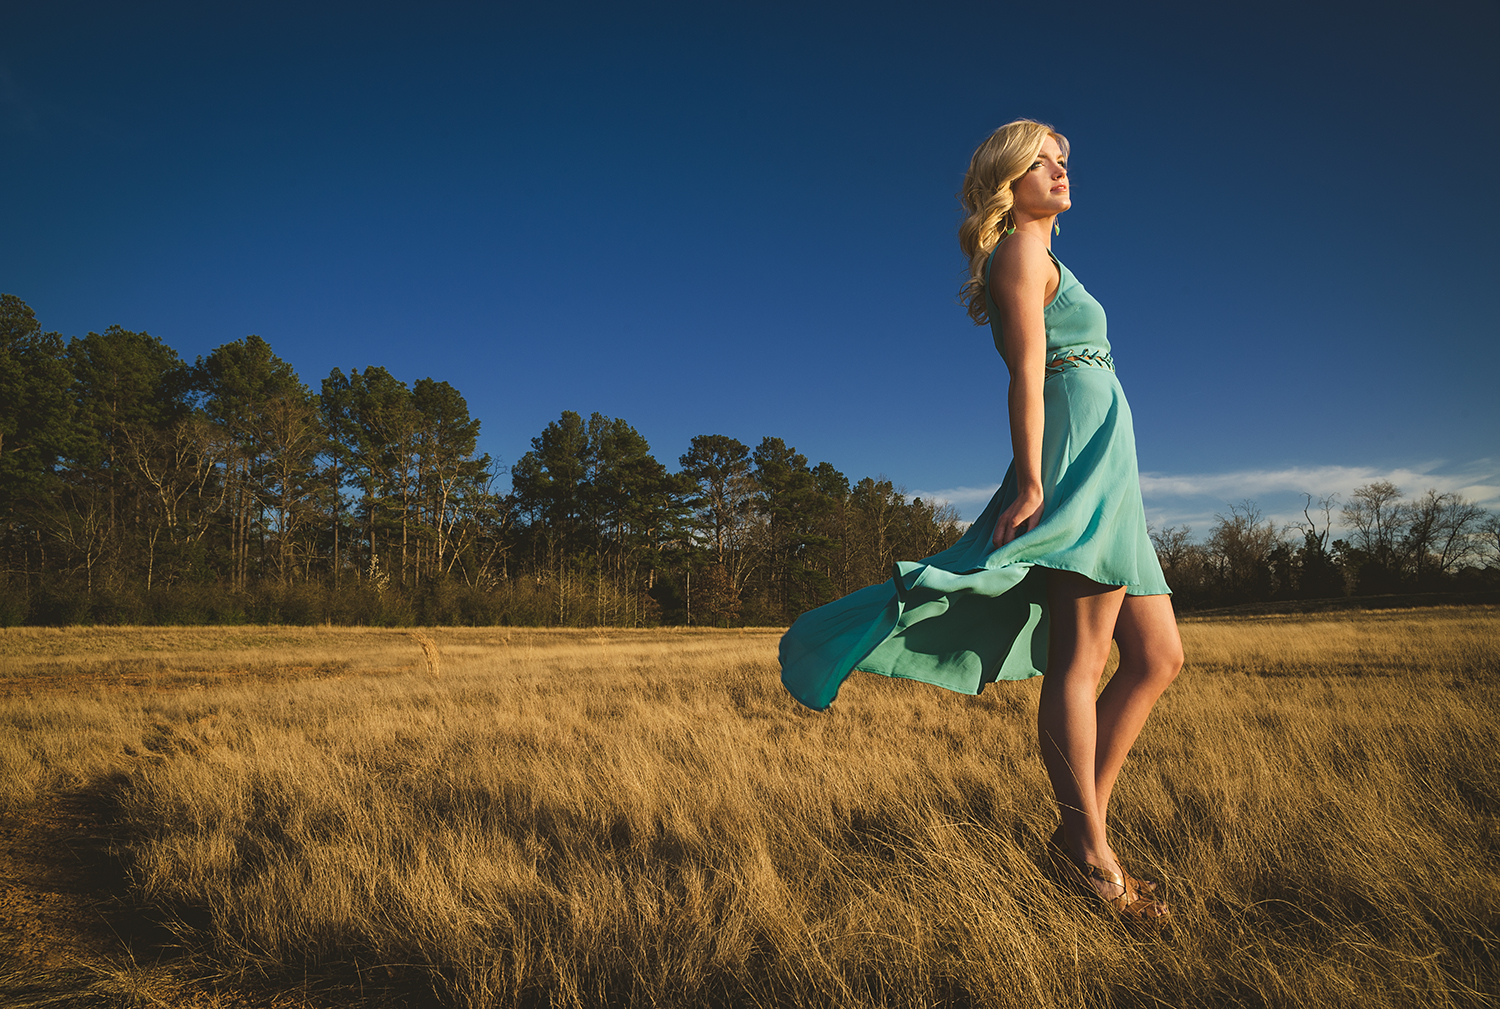
My friend Jamie chained herself to the railing of the Texas Senate Gallery back in July to protest the state's harsh anti-abortion bill. Security forces frantically raced to cut her away as state lawmakers passed the controversial House Bill 2. An impressive act of protest for this deeply red state, images of her surrounded by befuddled and frustrated DPS troopers appeared in USA Today, cable news shows and scores of blogs for and against the actions she and her friends took that day. It was quite a step from the quiet East Texas girl I met about a decade ago.

Politics aside, it seems to me that anyone should be able to appreciate her passion and creativity. I caught up with Jamie in an eclectic former transit bus parked by a children's splash pad in Tyler.

The 1966 Flxible bus resembles a flower child daydream come true and is occupied by Jamie and two of her fellow protesters from that night: Natalie and Caitlin. The Austin residents have christened the repurposed ride the R.A.G.E. (Radical Adventures for a Greener Earth) Bus. Armed with solar powered amenities, a composting toilet, seemingly hand-made everything and a kitchen built around a sink found on the side of a road – it is quite the sight.

The trio has just embarked on a cross-country trek after various delays led to a handful of false starts.

"We tried to plan … the universe just laughed at us," Natalie said. 

But after the group appeared in court to settle charges against them stemming from the Senate protest, they took off immediately.

"We were like, ‘We are not going to believe that we can actually leave this city until we go,’ " Caitlin said. "So we just had to go, it didn't matter what time it was."

The group has only a loose schedule for the road trip, but an agenda full of protests, education and sightseeing. They are eager to teach others about numerous issues, and things they have learned about greener living.

As far as the actual work of driving across the country, Natalie and Jamie take turns at the wheel, switching off periodically.

"We both like to drive, so someone is always willing to take the wheel," Jamie said.

Jamie cites her desire to use the trip raise awareness about the environment and our way of life.

"I'm really kind of disgusted and disappointed by the impact we've had on the Earth," she said. "So, I really want to make an effort to minimize [the extraction of natural resources] and reject all those social norms, and stop living a materialistic life, and start fulfilling myself with things that really do make us happy like community and love."

It had been a while since I got to sit and chat with Jamie before we reconnected earlier in summer. She has always been a wonderful person, but I have never seen her so full of joy and confidence. She is a licensed medic, and I used to quite earnestly tell her she was a superhero for her work. I was sad that she never seemed to believe me. 

After spending some time with her again, I recognize Jamie might finally be embracing her cape.

R.A.G.E. Blog:  http://ragebusproject.wordpress.com

R.A.G.E. on Facebook:  http://www.facebook.com/ragebusproject

Check out the entire set on Flickr, or here: 

New look, new work by Jamie Maldonado

I gave my website a fairly thorough refreshing. You'll see plenty of familiar photos, but also a handful of new images in every category. I've been spending my summer trying to shoot more personal work, and it seems to be going well. I also traveled to Arkansas (where I took the leaping portrait that leads my portfolio, and the canyon background image on this page).

I've got images from some weddings to post and finish editing, several portraits and a band portrait or two I need to hold off of sharing until it officially released by the artist. Among other things! So keep checking back here and on my various social outlets (links at the bottom right!). And feel free to let me know what you think of the new look and my newer work!

Even better, get in touch, and we'll make some great images together. :)

New camera! by Jamie Maldonado

​Lauren, a good friend and good photographer, as seen through my new Nikon D600. Sunset + a little flash can be a great combination. 

Lauren, a good friend and good photographer, as seen through my new Nikon D600. Sunset + a little flash can be a great combination. 

It has neither the recognition of the Canon 5D Mk. III, nor the mega megapixels of the Nikon D800, but I recently purchased the Nikon D600 and I could barely be more pleased with my choice. 

It is a splendid balance of functions in a refreshingly light package. ​Sure, it doesn't have the nearly untouchable movie mode of the 5D Mk. III, nor does it have quite the light sensitivity (or so I've read), but it also costs at least $1,000 less. And I strongly prefer Nikon's sensors to Canon's in terms of color, dynamic range and even sharpness. 

​And though I can't go toe-to-toe with Phase One and Hasselblad in resolution with the D600 like I could with the D800, the D600 allows me to remain relatively swift in the file size department, while cranking out resolution that dreams were made of just a few years ago. I get  tingles of joy when looking at my D600 files that are usually reserved for medium format cameras.

​I ordered a refurbished camera in hopes of saving a few bucks, and paid for it by getting a camera that was still defective. However, Nikon's 90-Day Warranty covered everything, and I was back in business in barely two weeks. Actually, it might have just been a bit more than a week ... And they went ahead and cleaned and recalibrated everything while they had it. So, while there might be somewhat of a risk attached to buying factory refurbished gear, I'd still deal with Nikon again. (I have an even better history with Apple refurbished products!) Please note, I've seen more new items be defective than I have refurbished items. Interesting, huh?

​Anyway, this entry was supposed to be two paragraphs long, and here I am. I have so much to work on that I better just add a photo and tell it to publish. I'm working on photos for two publications, a wedding, bridals and some personal work. And I have more around the corner! 

Lately ... by Jamie Maldonado

​Laney, being awesome. Click here to find out more about the photo! 

​Laney, being awesome. Click here to find out more about the photo! 

I realized I should be using my blog more to keep up on what I've been shooting, instead of forcing myself to try to dream up rich content and long posts. Those might fall out of my head randomly, but I'll try first to let you know what I'm doing now, and share a glimpse of my work as I'm doing it. ​

​In that spirit, at this very moment I am burning a disc to deliver the final images of a wedding, culling photos from a wedding this past weekend (beautiful and fun!) and preparing to send proofs to another bride. I'm also helping plan a big fashion shoot I'll be doing for a bridal magazine. On the non-wedding side, I'm working on scheduling a family session, editing promotional photos for a musician, preparing to document a luthier's workshop and I'm also editing some personal work while lining up more. This is all on top of my day job as Lab Manager for Kilgore College's photography and journalism programs. Whew! 

There you go: You CAN make a living doing what you love. It's not always easy, and I am sure plenty of challenges await, but I'm loving the ride. Take that, cynicism. ​

​The photo above is of Laney, shot at a new favorite spot. 'Nuff said?

Where is the time? by Jamie Maldonado

​Meredith, in Austin, Texas.

​Meredith, in Austin, Texas.

Where does the time go? I've been busy as all get out. I really should be blogging about it all here, especially so you know I'm actively working all the time as a photographer. It's easy to dismiss sharing, which is actually true for a lot of life. 

It's so easy to get caught up in life and forget to let anyone in on it.​

How do you know I've shot thousands of frames of family portraits, news, conceptual fashion, still life or phone photography this summer if I don't tell you? How does your best friend in another city know? How does your mom know what you're up to, or your spouse? ​When was the last time you talked to that good friend or even your sibling living in another state?

Take a minute and share. I'm kind of doing that here, by blogging and by posting some photos. Let's work on this sharing thing, and let's not get too caught up in all life throws at us.​

I really could quote the great Ferris Bueller (and I will) ...

Life moves pretty fast. If you don’t stop and look around once in a while, you could miss it.

New portfolio added! by Jamie Maldonado

Those who know me in person have probably witnessed my sometimes obsessive iPhone photo snapping at some point. In fact, if you've been somewhere with me at sunset or sunrise, it's almost guaranteed you have. I'm an avid Instagram user (there's a link on the bottom of the website navigation to your left!) and first fell in love with the quirks of camera phones when I decided to give Hipstamatic a try. Despite some misgivings – and my expensive digital SLR/random awesome film SLRs – I found the lure of immediacy and low-investment creativity irresistible. I found myself unexpectedly pushed  outside of my normal photographic confines, looking much more often at nature and still life, and enjoyed the results beyond any expectations. So let me say it loud:

The iPhone and apps like Instagram and Hipstamatic made me a better photographer. 

Eat it! Better  yet, let go of pretensions and take the same step I did. Make the most of what you have and enjoy it. 

And oh yeah, check out my new gallery here or by clicking the link on your left!

Published in Giving City Austin magazine by Jamie Maldonado

One of my pictures in the current issue of Giving City Austin magazine. If you live around Austin, pick it up! Or view it online here.

One of my pictures in the current issue of Giving City Austin magazine. If you live around Austin, pick it up! Or view it online here.

Several of my photographs are featured in the latest issue of Giving City Austin magazine. It's a great publication about people doing good things for others in need. How do you not like that? I had a great time working on the images, and appreciate editor Monica WIlliams for hiring me. Also, DJ Stout is involved with the design ... so you know it looks great. I hope to do it all again for the next issue! 

I'll share a few larger images from these shoots down the road, but until then, read the issue online here, or pick it up if you're in the Austin area.​

​P.S. I originally tried to embed the reader on the page, but I couldn't get it to not mess up the code and put a giant gap in the entry. Sigh. 

A box full of negatives, Part 2 by Jamie Maldonado

For part 1, scroll down the main blog page or click here!​

I'm not sure I can help you properly understand exactly what having full-time access to an SLR was like for me in 1997. Even the cheapest SLRs were hopelessly out of reach for me financially. Even casual access was enough to justify any awkwardness or difficulty being a yearbook staff member could have meant. (For what it's worth, it was spectacular.) For me to be handed that Rebel (the FIRST camera labeled Rebel, for the record), a couple of lenses and a cruddy flash was almost akin to winning the lottery.

​The pile o' negatives. There's a lot more here than it looks like. Each strip represents a roll of film.

And so I embarked on a year that also saw me using a Rebel Xs before finally settling on a brand new Rebel G and a 540 EZ flash. I spit through dozens of rolls of film and expanded my world with every event and moment I documented. Those photos are technically pretty awful, but they represent so much growth and experience – artistically and personally. And they happen to represent a year of everyone else's lives, too. 

Games, classwork, presentations, concerts, parades, pep rallies, graduation … all the stuff you'd expect from a year of school. (Though I did pass the camera off for prom, and obviously had to give it up for most of graduation.) I photographed awkward freshmen, proud and confident seniors and everyone in between. I attempted to snap a picture of everyone I possibly could at Kilgore High School. Some turned out surprisingly nice, and many are predictably hideous.

After the whirlwind of producing a yearbook with a skeleton staff (that's a whole other story), the negatives wound up in a manilla envelope, which floated around the office for much of the next year, before I managed to rescue it from oblivion on a post-graduation visit. 

I took the negatives home and placed them in an old Nike shoebox that has since followed me around through the years, in storage, in a closet or under a bed. A couple of years ago, I took the box out and realized how curious I had become about its contents, and how much I had forgotten about the things I experienced in my earliest days behind the lens. 

Starting with my Class of 1998, every one of these students have recently come around to their 10-year reunions, concluding with last year's 2000-2001 reunion. Through social networking, so many of us have reconnected, sometimes after years of silence. 

"How cool would it be," I thought, "to scan all of these and put them online for all the people I am reconnecting with."

It was surprisingly fun for me to dig through these images, even if I was not always fond of high school. So I began scanning negatives, and soon realized how overwhelming it would be to ever digitize these in a reasonable amount of time. It was around then I discovered Scan Cafe, via a discount code linked on a website.

I generated a little interest with a Facebook note, which lead to a few kind donations, which encouraged me to eventually take the plunge. I could only afford to scan maybe a third of the box, but it was a neat experience. Copies of the first batch of scans are on their way to the contributors, and I hope they enjoy their historic value as much as I do.

As busy as I've been it's been slow going, not to mention eating nearly $200 scanning them was a bit of a blow to my enthusiasm. But hopefully they will enjoyed, and maybe we can gather some extra funding to help plow through the rest of the box, and to figure out a way to share these images between those interested.

I could embark on a digital vs. film debate here, but the real story is about photography. Photography dragged me out of my high school shell. A camera introduced me to hundreds of classmates (and now countless others). Wanting good photographs lead me to directing people and boldly seeking out pictures I might normally have shied away from. Every frustration over a missed shot – and conversely, ever success – led to a new lesson. And now these almost-discarded negatives are helping me and others relive and even appreciate a part of our shared past.

And trust me, if it helps me appreciate high school, it's pretty profound.

A box full of negatives, Part I by Jamie Maldonado

One of my better early shots. Autumn and Ben, circa 1997. Scan from actual color film, so those are real sprocket holes there. 

One of my better early shots. Autumn and Ben, circa 1997. Scan from actual color film, so those are real sprocket holes there. 

This is not a self-help post (though I could probably make one to match that headline). It is about a shoebox of negatives that has followed me around since about 1999. The Nike Air Blindspots that came in the box disintegrated long ago, but the important – albeit sometimes embarrassing – relics I kept in their place represented not only my earliest photographic endeavors, but also glimpse at a year in so many young lives.

I shot every frame between August 1997 and June of 1998, as the photographer for my high school yearbook. It was the end of my junior year that I decided to experience the outside world and toss in an application in hopes of making the yearbook staff. I was pretty stinking poor and this was the best chance I could hope to have my hands on a "professional" camera any time soon, even if it meant overcoming my extreme shyness.

I agonized all summer, not knowing if I would make the staff or not. I fantasized about working on the publication, and especially about getting to use the camera. My older brother had gotten to use an SLR at times when he was part of the middle school yearbook staff in 8th Grade. It definitely planted a seed.

In the intervening years, we had rediscovered freestyle BMX and the photographic genius of the Wizard Publications staff (Bob and Windy Osborn, and Spike Jonze), and especially the vibrant work displayed in the pages of Freestylin' magazine. I badly wanted to be Spike Jonze, at least photographically. Spike was tearing it up as a music video director at the time, and was essentially a superhero to us because of his BMX roots.

And so the summer of 1997 mercifully drew to an end, and I finally got to see the class schedule for my senior year, and delight in realizing I had made it on the yearbook staff. Now if I could just get my hands on that camera … a time or two?

The first day of school arrived with the anticipation of a childhood Christmas. My entire day centered around what would happen in this yearbook class. Would I find out my photographic fate? My mind was awash in scenarios that involved me getting to take the camera home at some point (when perhaps it might have been more normal to think that about some attractive classmate).

The moment of fate arrived, and I walked into the yearbook lab/classroom. Before I could conjure a sentence, the teacher asked if I was the one who wanted to take pictures. I could barely answer before a stark blue camera bag was shoved at me, and I was informed that I was pretty much the only person who cared to use it ...

Come back tomorrow to read the rest of this novel-length blog entry!​

Welcome to my new home! by Jamie Maldonado

The new look. Tell me what you think!

The new look. Tell me what you think!

​I first launched my website in the summer of 2008. It was a splendid site professionally designed by my friend Jessica Caldwell, who has gone above and beyond in her work for me.  It has landed me more jobs than I can count, and  is a huge reason I have gotten a big chunk of the money I've earned since we launched so long ago.

Years passed, and it became time to update and refresh my site. However, with equipment upgrades breathing down my neck, hiring out again wasn't a legitimate option. Enter Squarespace. ​Upon a repeated suggestion from my younger brother, I once again investigated the extremely flexible and user friendly web service. I was beyond pleased, and quickly signed up. 

This also provided my new URL: www.jamiemphoto.com. Why? Well, jcm-photo.com (which still works!) seemed like a perfectly good idea a few years ago, but time has shown the hyphenated name to be a pain, as well as the fact that I use my middle initial almost no place else in my life.

​This also means the disappearance of my once-beloved old blog. I won't say that I might not stash it somewhere else, but I hope I can keep up with this one enough to make up for it, or more. 

What's extra awesome about this setup is that I will be able to easily update my site CONSTANTLY (without persistently bugging Jessica). Look for blogs about new shoots, and for my portfolios to be alive with all kinds of different work. Don't be surprised if I properly refresh my website design now and then, either. It's all very exciting to think of.​

So what do you think? Please feel free to share, ask questions or just speak your mind. Thank you!​​